
Setting Up a Desktop Session
Updated: September 16, 2022
Overview
This topic walks you through how to use Rescale Desktops. From within Rescale, you can set up a desktop for running GUI applications, allowing you to create a customized remote desktop using selected software, operating systems, jobs, and projects.

In order to access the Desktops feature, log in to your Rescale account. If you don’t have a Rescale account, you can create an account here: Rescale Signup. Please contact us if you’re having trouble.
Creating your desktop
To proceed with setting up a Desktops session, click the Desktops tab and select + Create New Desktop.

Next, you’ll name your desktop and select the type of software you want to run on it. For this tutorial, we’re using ParaView GUI.
Note: Once you select the software, the Hardware section below will automatically update to offer only hardware compatible with the work you want to do.
At this point, you can add any already-existing jobs you’d like to the desktop. Input and output files from those jobs will be available on the desktop.
Finally, select the hardware you want to use and set an appropriate walltime limit.
Once you’ve made your selection, you can click Launch and it will start the session. This will typically take a few minutes.Here’s what the Desktop Setup page will look like:

Connecting to your desktop
Once the servera server is a computer program that provides services to oth... More has started, you can connect either in-browser or via a client on your local machine.
Connect in-browser
Connecting in-browser is frequently the lowest-effort connection, but it provides a lower-resolution desktop session. To connect in-browser, click the Connect button once it appears, as shown below. It should appear once the OS is installed and updated and the Rescale runtime is configured.
After you click the Connect button, you can use the remote desktop right in your browser.

Connect with a client
Connecting with a client on your own computer can offer much better graphics than an in-browser connection, but it requires a little more setup. The process is very different for Windows and Linux desktops, but in both cases, these are the required ports for visualizationVisualization is the representation of complex scientific or... More:
RDP: Port 3389
VNC: Port 5900/5901
DCV: Port 8443
If your company does not allow traffic through one of these ports, that method of desktop visualization will not work.
Steps for connecting to your windows desktop via a client on your computer:
- Download a client. Recommended options:
- Click the dropdown next to Connect, and select the connection method you plan to use (DCV or RDP) and expand its instructions.
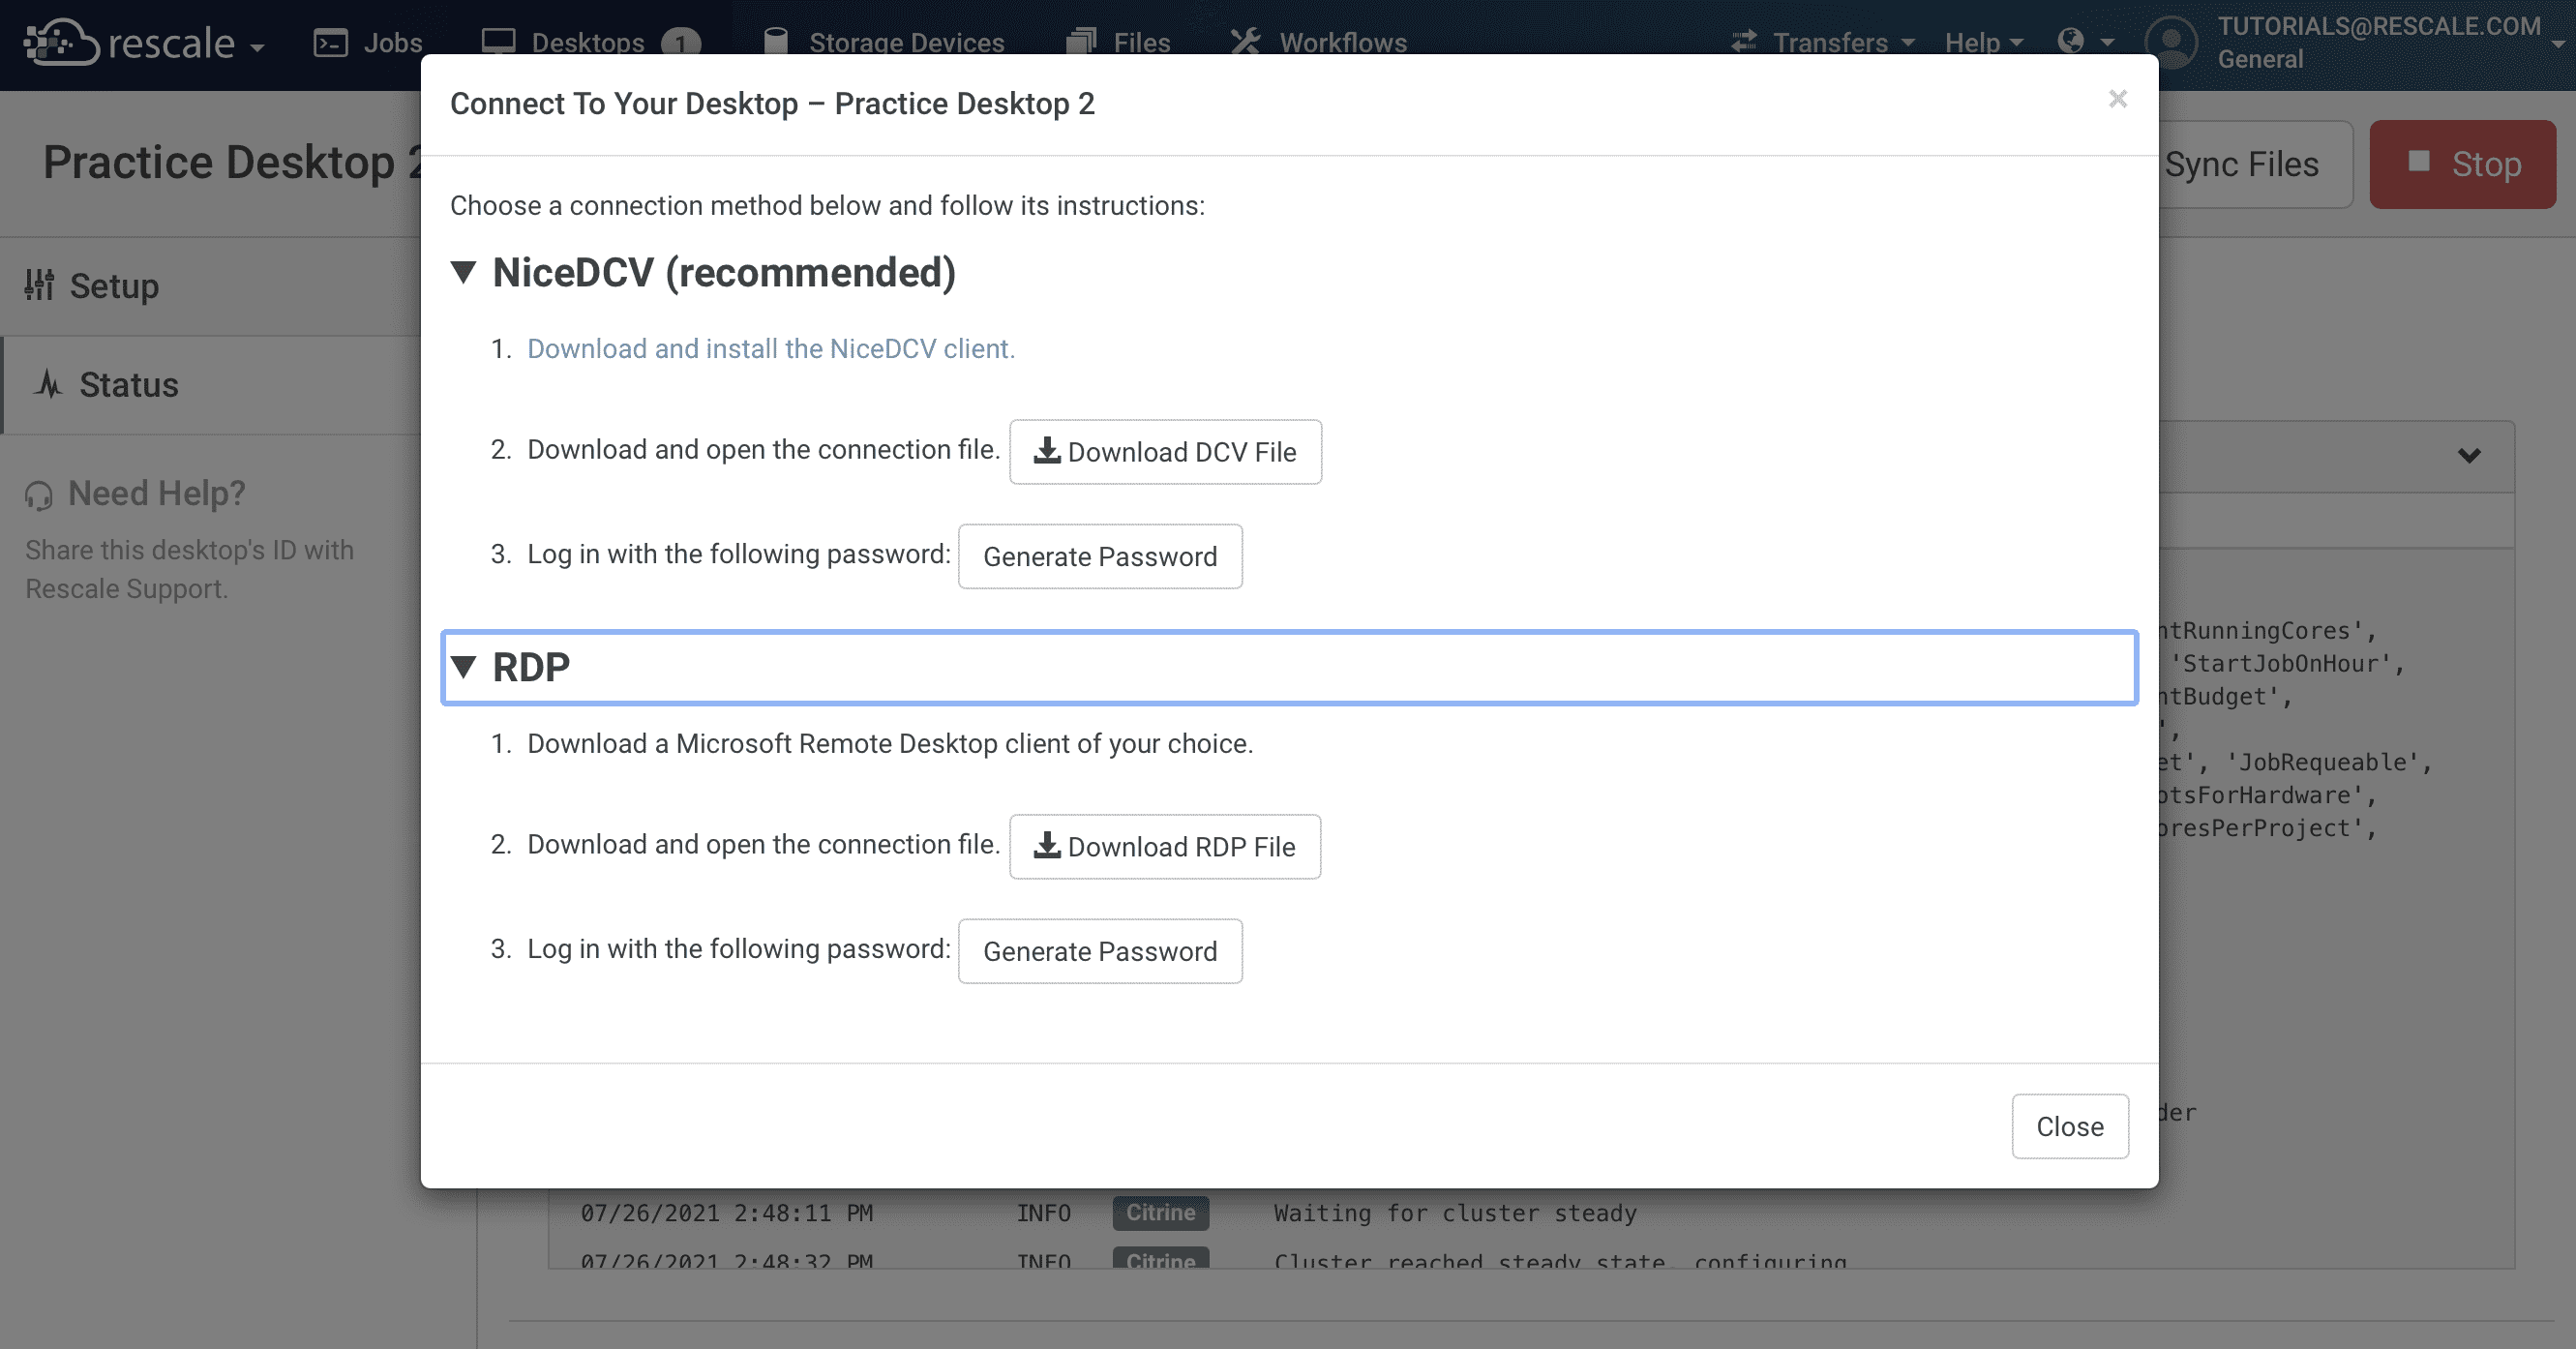
- Click on Generate New Password.
- Click Download File for your chosen client.
- Double click the file to open. You will be prompted to enter the password generated in step 3. Note that it is case-sensitive. The same password is used on the Windows user sign-in page.
Connecting with NICE DCV (recommended)
- Download NICE DCV (here).
- Click on Generate New Password.
- Click Download File for your chosen client.
- Double click the file to open. You will be prompted to enter the password generated in step 3. Note that it is case-sensitive. The same password may be used on the user sign-in page.
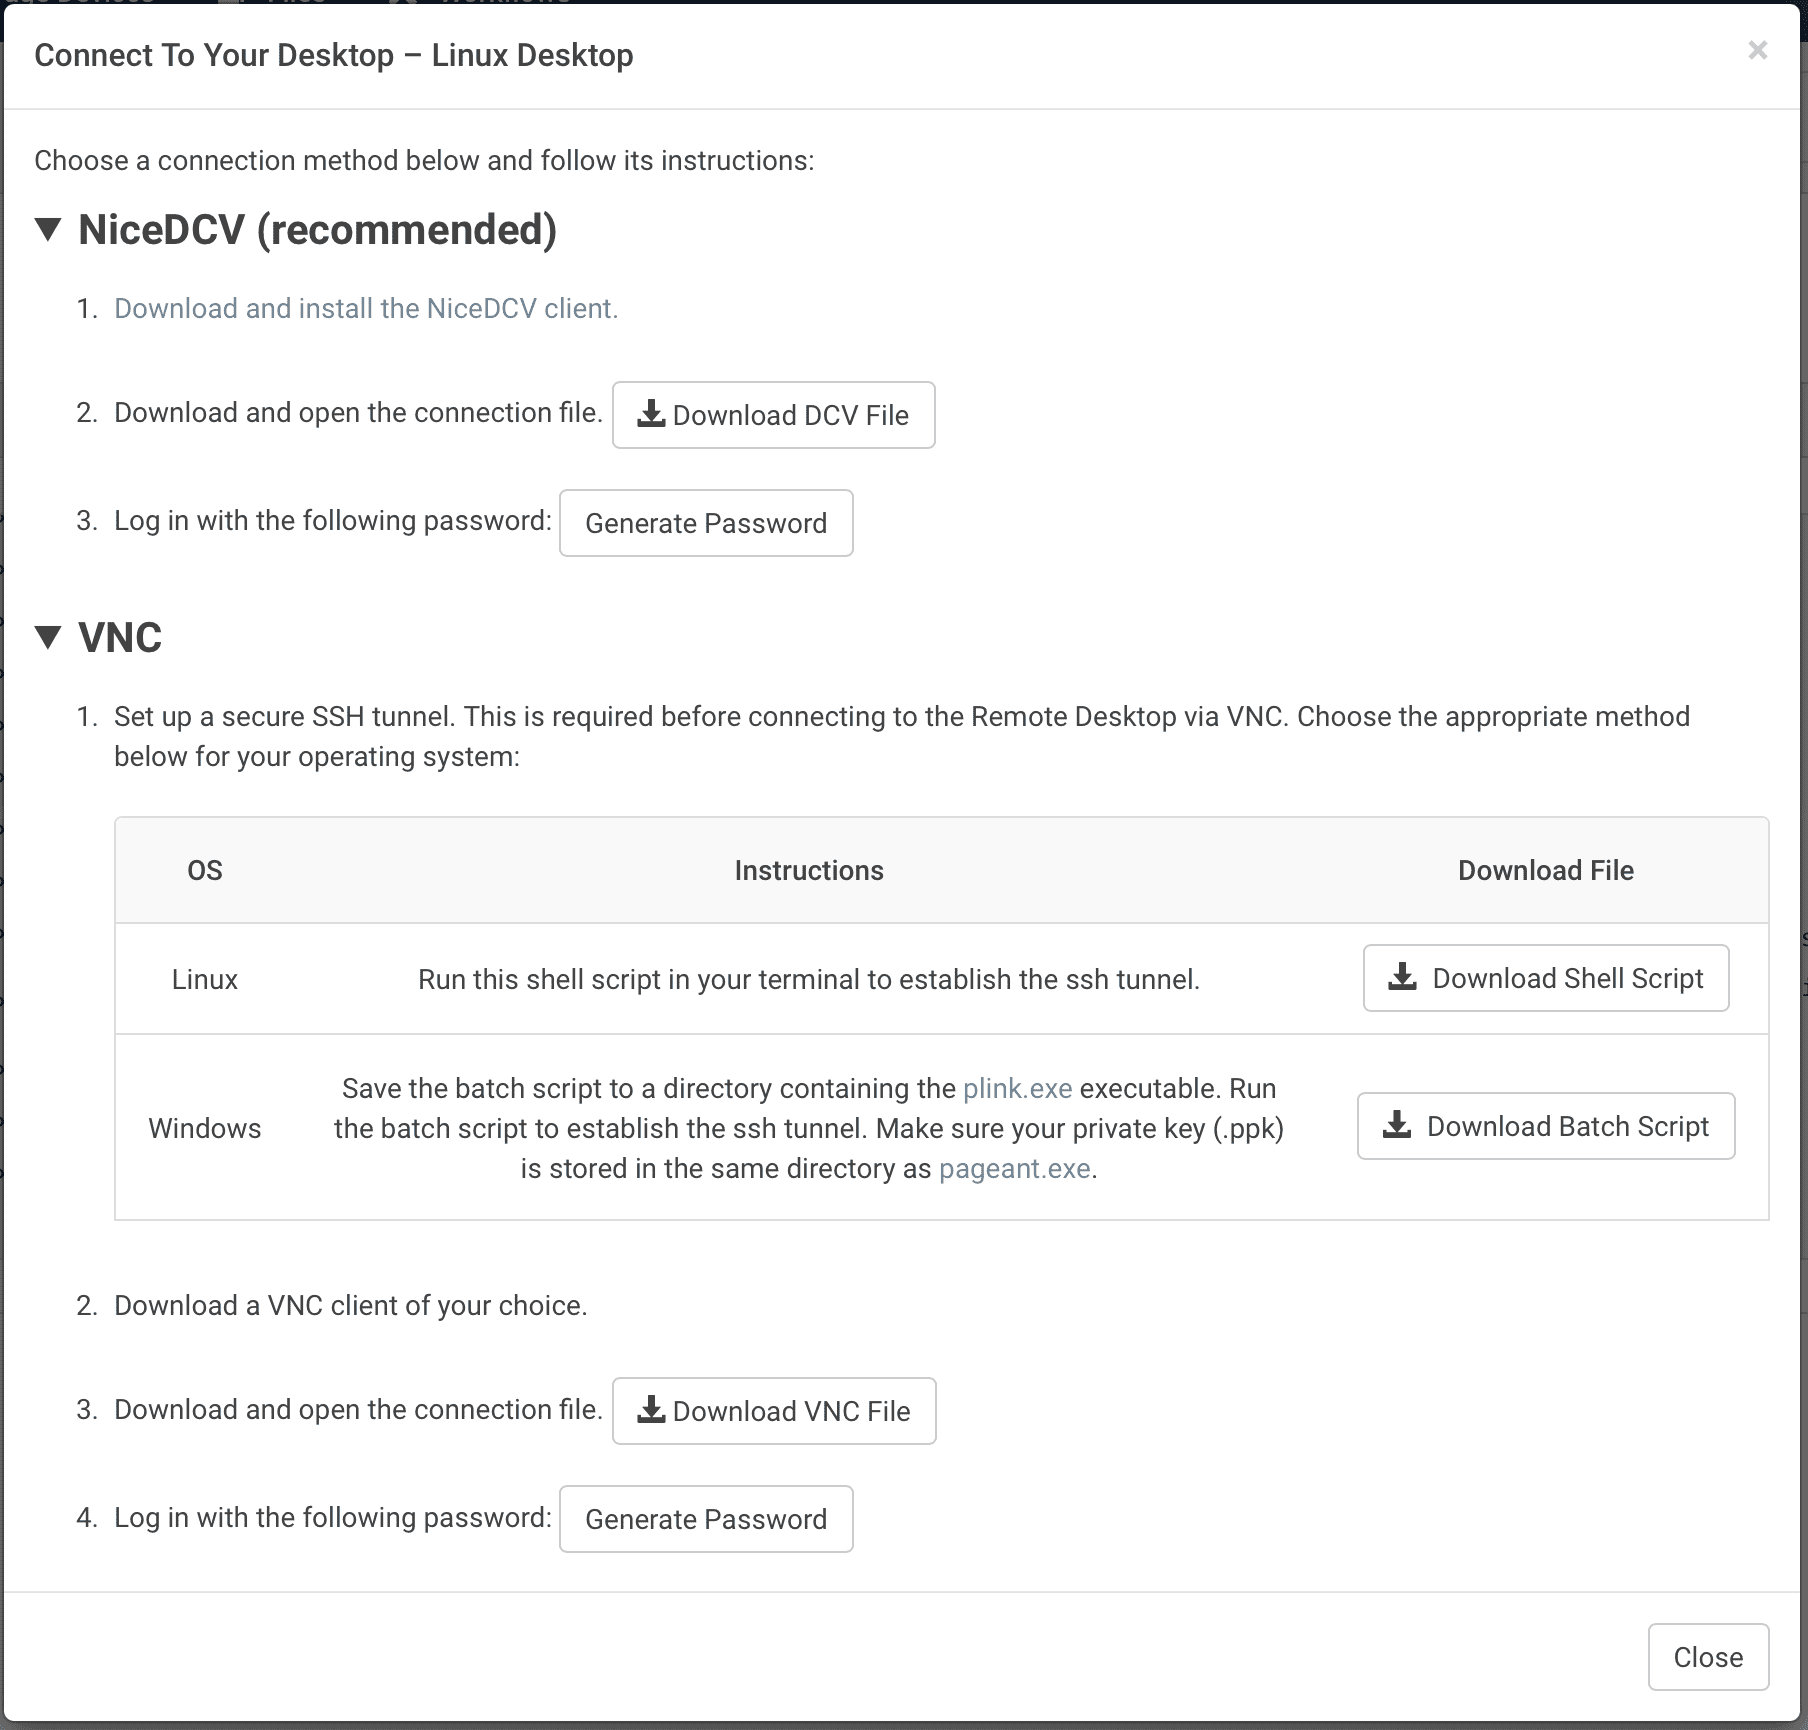
Connecting via SSH tunnel and VNC
- Download a VNC client of your choice. Real VNC is a nice (and free) example (download).
- Set up an SSH tunnel.
- Ensure you have your SSH key set in your user profile. Follow the instructions here.
- Download the appropriate shell script – use the Linux option for anything Unix-like (including Mac), and the Windows option for Windows.
- Run the shell script and keep it running in the background.
- Download the connection file.
- Double click the downloaded file to connect to your tunnel.
- Generate a password and enter it to access your desktop.
You should now be viewing your remote desktop. Use the terminal to navigate to and launch the executable under the /program/ directory.
Next steps
Once you have set up a desktop session, you can then view the following topics for more information about how to further configure your desktop:
- See Add/Remove Software and Jobs to learn how to add and remove software supported by Rescale, as well as how to add and remove jobs from your desktop.
- See File Transfer to learn how to properly transfer files between your active Rescale Desktops session and your Rescale cloud files.
- See Visualization Example to learn how to use the Desktops feature to perform remote visualization on Rescale.